 使用Redux制作一个TodoList
# 引言
在组件化开发的 web 前端当中,经常的需要在不同的组件之间进行通信以及一些数据共享,那么我们就需要使用像 Vuex 那样的状态管理工具,在 React 当中,经常使用 Redux 来做状态管理工具。
# 一、开始
这里使用 antd 作为 TodoList 的 UI 组件,所以首先我们需要在项目当中安装 antd
yarn add ant
yarn add redux
yarn add react-redux
2
3
创建出页面,TodoList.jsx 代码如下:
import React, { Component } from 'react';
import 'antd/dist/antd.css';
import { Input, Button, List } from 'antd';
import { connect } from "react-redux"
import { addItem, delItem } from '../redux/actions'
import PropTypes from 'prop-types';


class TodoList extends Component {

  static propTypes = {
    data: PropTypes.array.isRequired,
    addItem: PropTypes.func.isRequired,
  }

  constructor(props) {
    super(props);
    this.state = {
      value: ""
    }
  }

  handleClik = () => {
    this.props.addItem(
      this.state.value
    );
    this.setState({
      value: ""
    });
  }

  handleChange = (e) => {
    this.setState({
      value: e.target.value
    });
  }

  render() {
    return (
      <div style={{ margin: '10px' }}>
        <div>
          <Input
            placeholder='Write Something'
            style={{ width: '250px', marginRight: '10px' }}
            onChange={this.handleChange}
            value={this.state.value}
          />
          <Button type="primary" onClick={this.handleClik} >增加</Button>
        </div>
        <div style={{ margin: '10px', width: '300px' }}>
          <List
            bordered
            dataSource={this.props.data}
            renderItem={(item, index) => <List.Item onClick={()=>{this.props.delItem(index)}}>{item}</List.Item>}
          />
        </div>
      </div>
    );
  }
}

export default connect(
  state => ({ data: state.data }),
  { addItem, delItem }
)(TodoList);
2
3
4
5
6
7
8
9
10
11
12
13
14
15
16
17
18
19
20
21
22
23
24
25
26
27
28
29
30
31
32
33
34
35
36
37
38
39
40
41
42
43
44
45
46
47
48
49
50
51
52
53
54
55
56
57
58
59
60
61
62
63
64
65
# 二、Redux的使用
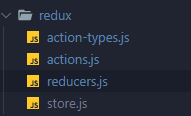
在项目当中新建 redux文件夹,在 redux 文件夹当中新建 action-types.js、actions、reducers.js、store.js文件:
action-types.js文件如下:
export const ADD_ITEM = "ADD_ITEM"
export const DEL_ITEM = "DEL_ITEM"
2
actions.js文件如下:
import { ADD_ITEM, DEL_ITEM } from './action-types';

// todolist增加项
export const addItem = (data) => ({ type: ADD_ITEM, data })
// todolist删除项
export const delItem = (data) => ({ type: DEL_ITEM, data })
2
3
4
5
6
reducers.js文件如下:
import { ADD_ITEM, DEL_ITEM } from './action-types';
import { combineReducers } from 'redux';

let list = [
  "早上九点起床",
  "中午休息两个小时",
  "下午六点下班"
]
const data = (state = list, action) => {
  console.log(action.data);
  switch (action.type) {
    case ADD_ITEM:
      return [...state, action.data]
    case DEL_ITEM:
      let newState = JSON.parse(JSON.stringify(state))
      newState.splice(action.data,1)
      return newState
    default:
      return state
  }

}

export default combineReducers({
  data
})
2
3
4
5
6
7
8
9
10
11
12
13
14
15
16
17
18
19
20
21
22
23
24
25
26
store.js 文件如下:
import { createStore, applyMiddleware } from 'redux';
import thunk from 'redux-thunk';
import { composeWithDevTools } from 'redux-devtools-extension'
import logger from 'redux-logger'

import reducers from './reducers'

// 自定义中间件
// const logger = store => next => action => {
//   console.log("dispatch->", action);
//   let result = next(action);
//   console.log("next store->", store.getState());
//   return result
// }


// 创建store仓库
const store = createStore(reducers, composeWithDevTools(applyMiddleware(thunk, logger)))

// 监听数据变化
store.subscribe(() => {
  console.log("state", store.getState());
})

export default store
2
3
4
5
6
7
8
9
10
11
12
13
14
15
16
17
18
19
20
21
22
23
24
25
tips: 本store文件当中需要安装中间件
index.js文件如下
import React from 'react';
import ReactDOM from 'react-dom';
import { Provider } from 'react-redux';
import store from './redux/store';
import TodoList from './components/TodoList';

ReactDOM.render(
  <React.StrictMode>
    <Provider store={store}>
      <TodoList />
    </Provider>
  </React.StrictMode>,
  document.getElementById('root')
);
2
3
4
5
6
7
8
9
10
11
12
13
14
# 三、Provider 组件和 connect 函数的使用
# 1、Provider 组件
在使用 react-redux 做状态管理时,需要在全局APP组件外包裹一层 Provider 组件,并设置其属性sotre
如下语句:
import React from 'react';
import ReactDOM from 'react-dom';
import { Provider } from 'react-redux';
import App from 'App';

ReactDOM.render(
  <React.StrictMode>
    <Provider store={store}>
      <App />
    </Provider>
  </React.StrictMode>,
  document.getElementById('root')
);
2
3
4
5
6
7
8
9
10
11
12
13
# 2、connect 函数
connect 函数为 react-redux 为 react 提供的更加方便管理状态的插件,使 redux 和 react 能够更加方便的整合和使用,改函数需要配合 Provider 组件使用,该函数有4个参数,但是我们一般只使用前面两个参数
- 导入
import { connect } from 'react-redux'
- 使用
export default connect(mapStateToProps, mapDispatchToProps)(AppUI);
connect方法可以省略mapStateToProps参数,那样的话,UI 组件就不会订阅Store,就是说 Store 的更新不会引起 UI 组件的更新。mapStateToProps:更新 props————>作为输入源。返回一个对象,key为UI界面对应的名称,value为state处理的结果mapDispatchToProps:更新 action————>作为输出源。触发action更新reducer,进而更新state,从而驱动参数1变化,引起UI数据的变化